
It is commonly believed that you cannot track Facebook events in Google Forms — you cannot put a pixel there, so everyone sends traffic to Google Forms through the “Traffic” objective without any event tracking.
Google Forms is a convenient tool that is used very often in EdTech and other fields. Fortunately, you can set up events for it through Facebook and optimize for them with the “Conversions” objective.
What you need
-
A Facebook pixel
-
An integration service — Zapier, Make or another one that supports the Facebook Conversions API
What to do
I will show it using Make — it has a convenient free plan.
-
Sign up for Make — you are all adults, you will figure out how
-
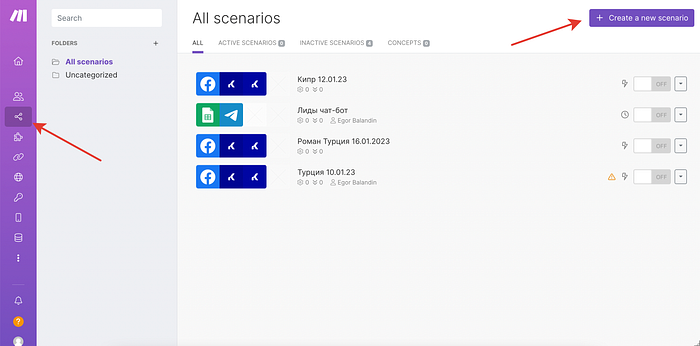
Create a new scenario:
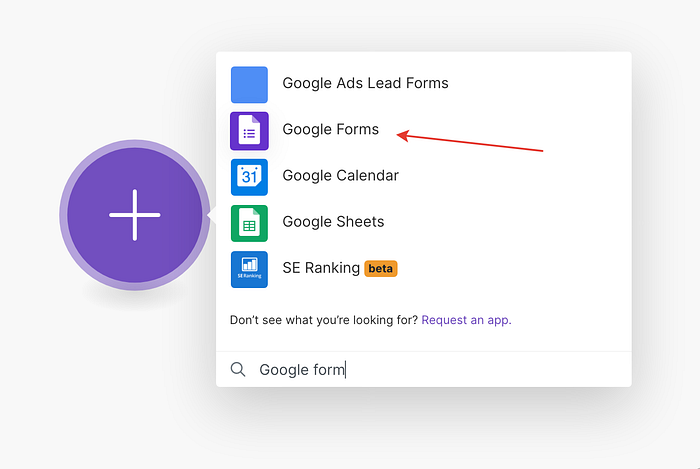
- Choose the first app — Google Forms:
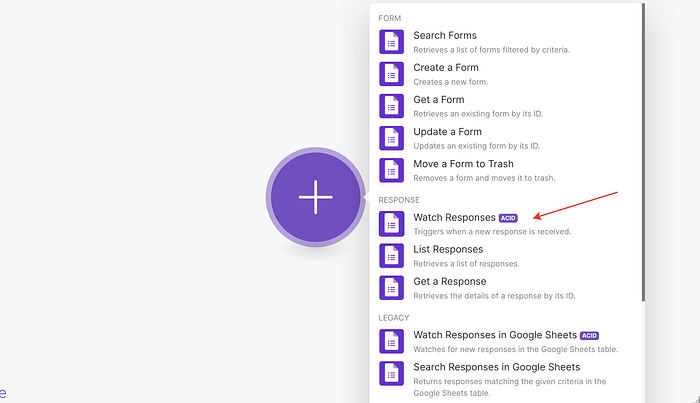
- Choose the Watch Responses event:
- Connect the Google account where the form was created, or where you are an admin:
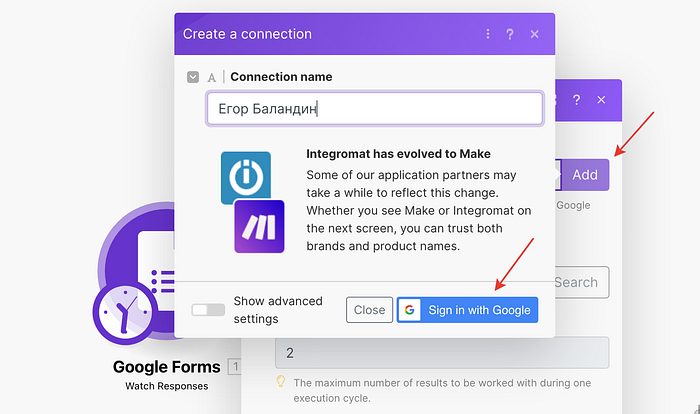
- On the next line, Google Form ID, click Search and pick the form you need in the dropdown:
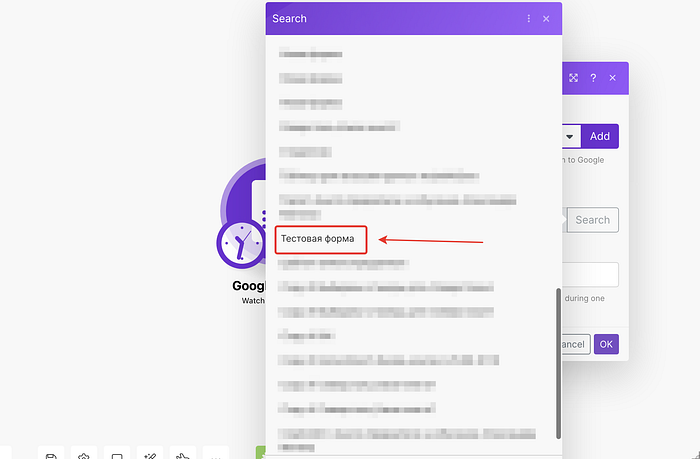
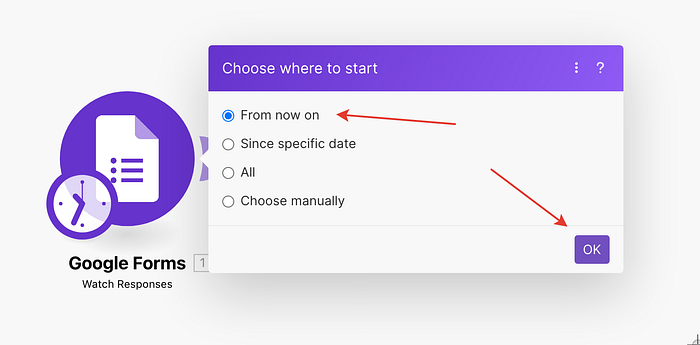
- Change nothing else and click OK. You will land on a new window — leave the first option selected there and click OK again:
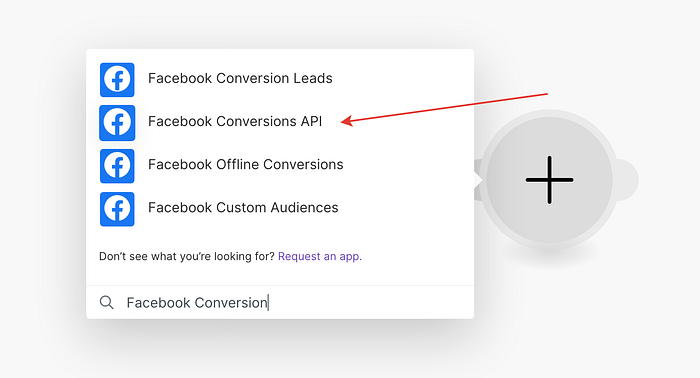
- Add a new app — Facebook Conversions API — and pick its only action, Send Event(s)
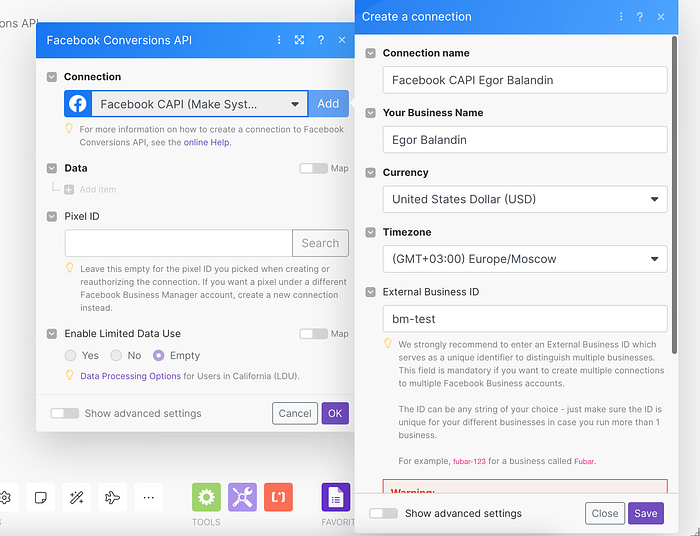
- Next you need to connect your Business Manager, ad account and pixel. In the Connection section click Add, fill in the information (it does not affect anything) and click Save:
- You will be sent to Facebook, where you need to log in and select your Business Manager, ad account and pixel:
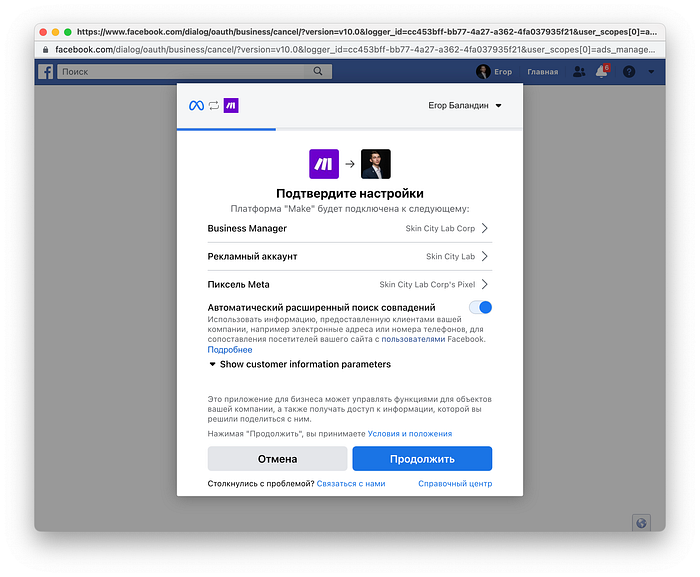
After the data is submitted, Make will connect to your Business Manager and pass all the data there.
The next step is setting up the event.
A few important points here — this is a server-side event that will send any information that left the Google form to Facebook, so to give Facebook more data the form should contain this information:
First name, last name (preferably in separate fields)
Phone number
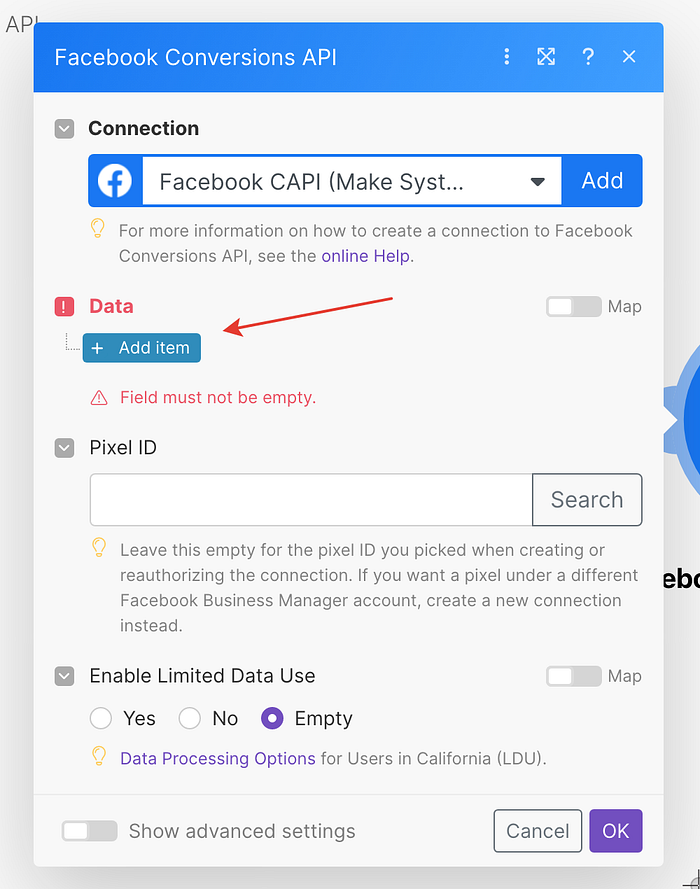
- Click Add Item:
- Fill in the fields like this:
✓ Event ID — skip
✓ Event Name — pick the Facebook event you need (usually Lead), but do not mix different events: if this pixel already has a Lead event, it is better to pick another one.
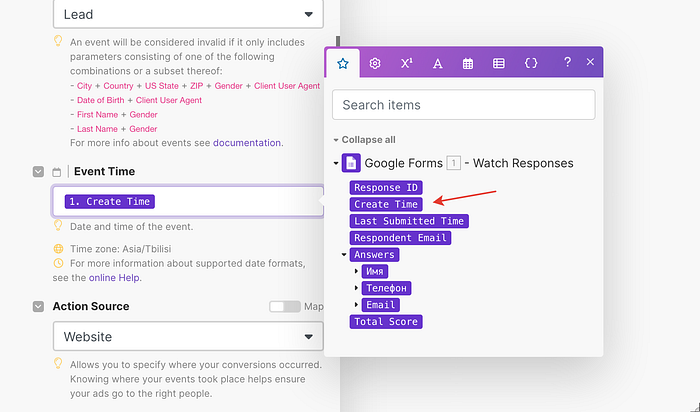
✓ Event Time — insert the time the event arrived:
✓ Action Source — website
✓ In the User Data section insert the user data:
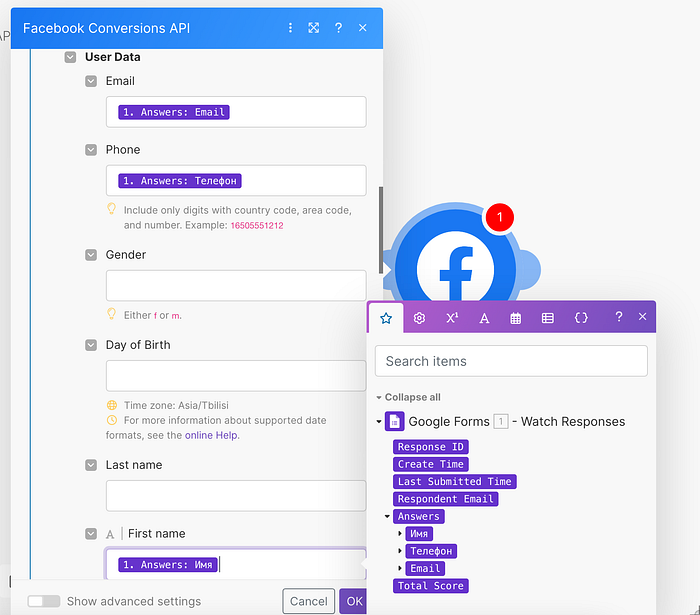
If you have more data that can be inserted — you can add it too
Everything after External ID does not need to be filled in.
In Pixel ID — insert your pixel ID and click OK.
- Turn the scenario on:
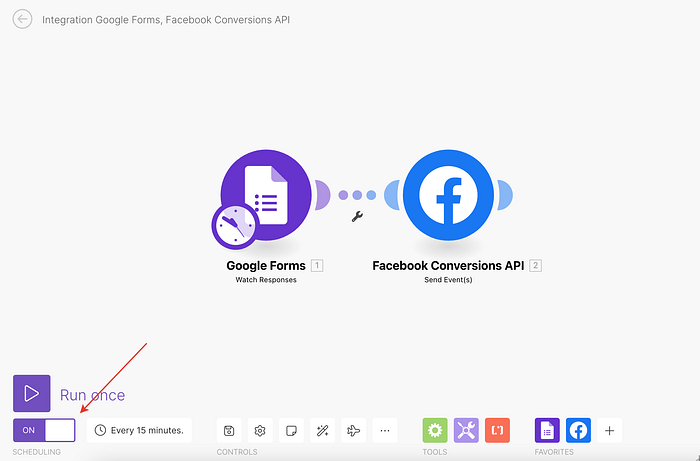
Done! Now every 15 minutes Make will check for new responses and send them to Facebook.
How to run the ads
Now go to Facebook Ads and create a conversions campaign, select the pixel you specified in the integration and select the event you specified in Event Name.
The events from the Google form will arrive there.