
For everyone trying to run traffic to a website, here is a step-by-step guide to installing the Meta Ads pixel on Tilda.
What the nuances are, how to work with several pixels, how to connect CAPI and beat 80% of media buyers on results.
Installing the pixel
- Take only the pixel ID from Events Manager
- On Tilda go to “Site settings” → “Analytics” → and paste the ID into the “Facebook Pixel” field
- Do not forget to publish all pages
The method is very simple; if you need pictures, you can always read Tilda’s own guide
What to do if you need to install 2 or more pixels on the site
Often, especially when promoting online schools, the Business Managers holding the pixels get banned. So for safety it is better to keep a spare pixel on the landing page.
Most media buyers repeat the same mistake — they add a separate Facebook code snippet for every pixel. That is the wrong decision, because loading a pile of code takes time and the page load speed drops. A more elegant solution is better
- First remove the pixel ID from the “Analytics” section so there is no pixel on the site at all
- Then copy the full pixel code from Events Manager:
<!-- Meta Pixel Code -->
<script>
!function(f,b,e,v,n,t,s)
{if(f.fbq)return;n=f.fbq=function(){n.callMethod?
n.callMethod.apply(n,arguments):n.queue.push(arguments)};
if(!f._fbq)f._fbq=n;n.push=n;n.loaded=!0;n.version='2.0';
n.queue=[];t=b.createElement(e);t.async=!0;
t.src=v;s=b.getElementsByTagName(e)[0];
s.parentNode.insertBefore(t,s)}(window, document,'script',
'https://connect.facebook.net/en_US/fbevents.js');
fbq('init', '1285036722098555');
fbq('track', 'PageView');
</script>
<noscript><img height="1" width="1" style="display:none"
src="https://www.facebook.com/tr?id=1285036722098555&ev=PageView&noscript=1"
/></noscript>
<!-- End Meta Pixel Code -->- This way you can install 1 pixel, but if you copy the line fbq(‘init’, ‘1285036722098555’) and paste it once more into the code with a different pixel ID, you can insert several pixels using the same code:
<!-- Meta Pixel Code -->
<script>
!function(f,b,e,v,n,t,s)
{if(f.fbq)return;n=f.fbq=function(){n.callMethod?
n.callMethod.apply(n,arguments):n.queue.push(arguments)};
if(!f._fbq)f._fbq=n;n.push=n;n.loaded=!0;n.version='2.0';
n.queue=[];t=b.createElement(e);t.async=!0;
t.src=v;s=b.getElementsByTagName(e)[0];
s.parentNode.insertBefore(t,s)}(window, document,'script',
'https://connect.facebook.net/en_US/fbevents.js');
fbq('init', '1285036722098555');
fbq('init', '5179911585515823');
fbq('track', 'PageView');
</script>
<noscript><img height="1" width="1" style="display:none"
src="https://www.facebook.com/tr?id=1285036722098555&ev=PageView&noscript=1"
/></noscript>
<!-- End Meta Pixel Code -->- Go to “Site settings” → “More” → “HTML CODE FOR HEAD” and paste the code you ended up with there.
This way you can put 2 or even 10 pixels on one site at the same time without using the full code for each pixel.
Result: the pixel is set up correctly, everything will work properly.
Setting up events
Tilda automatically sends some events once the pixel is installed.
We will look at the 2 most common situations of using Tilda landing pages and the instructions for setting up events correctly:
Collecting leads
When the site is used to collect leads through forms.
-
Go to the “Test events” section in Events Manager, enter the landing page you plan to send traffic to and submit a test request.
-
If a Lead event appears after filling in the form, everything is set up correctly.
If the event did not arrive, go into the Tilda builder settings and see how the lead form was created. In online education the form is often built through GetCourse; there is a separate guide for setting up the event through it.
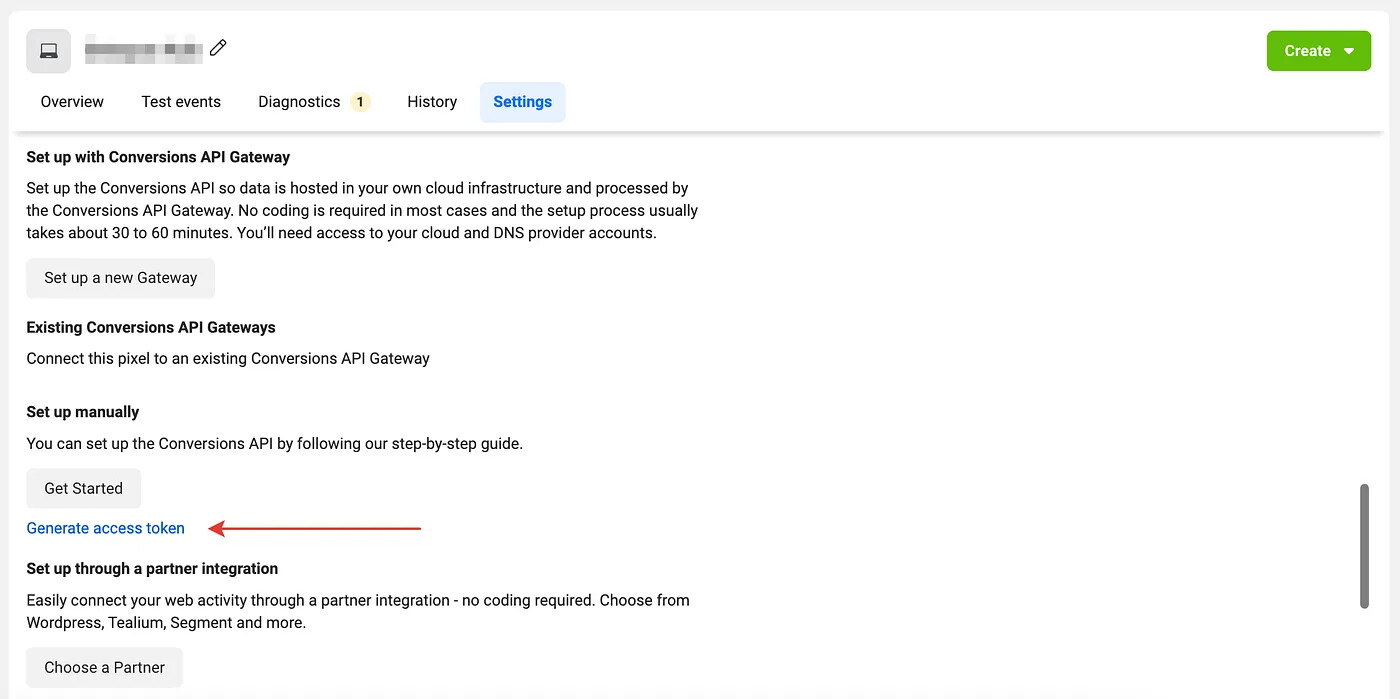
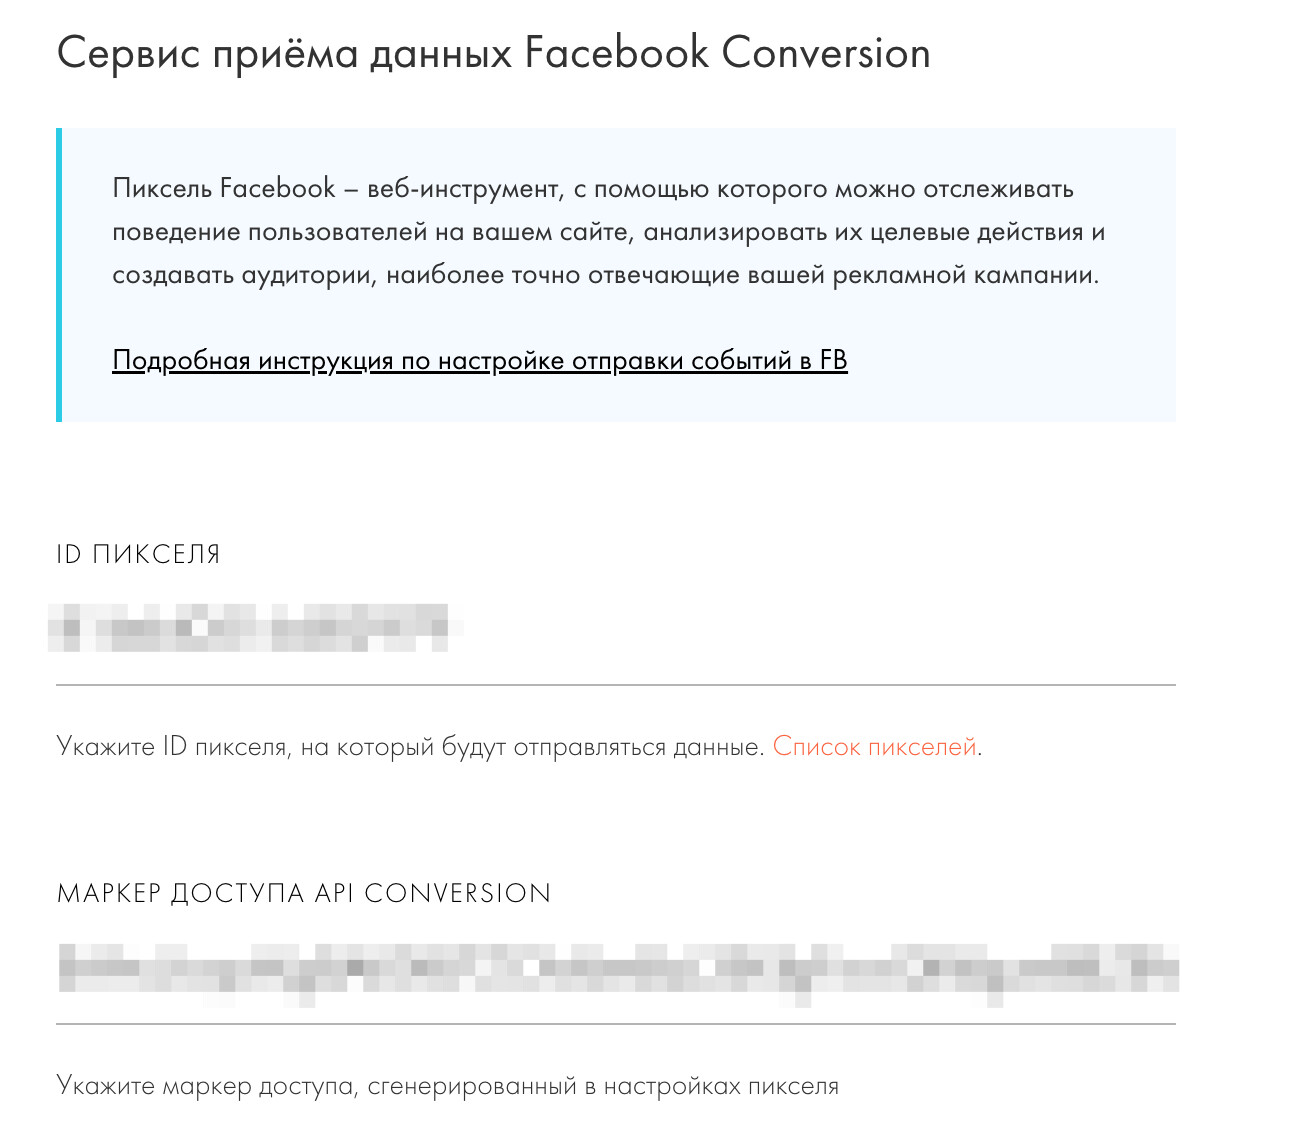
- Inside Tilda go to Site settings → Forms → at the very bottom find Facebook Conversion API and add it. In the settings you will need to paste the pixel ID and the access token. To find the access token, go to Events Manager → Pixel settings → scroll down and look for “Generate access token”:
A long string of characters will appear — that is the access token; paste it on the page in Tilda:
- After adding it, connect the service to all forms on the site.
Result: after setup you will be able to optimize for the Lead event.
Selling products
If you have a payment module and a cart connected on the site.
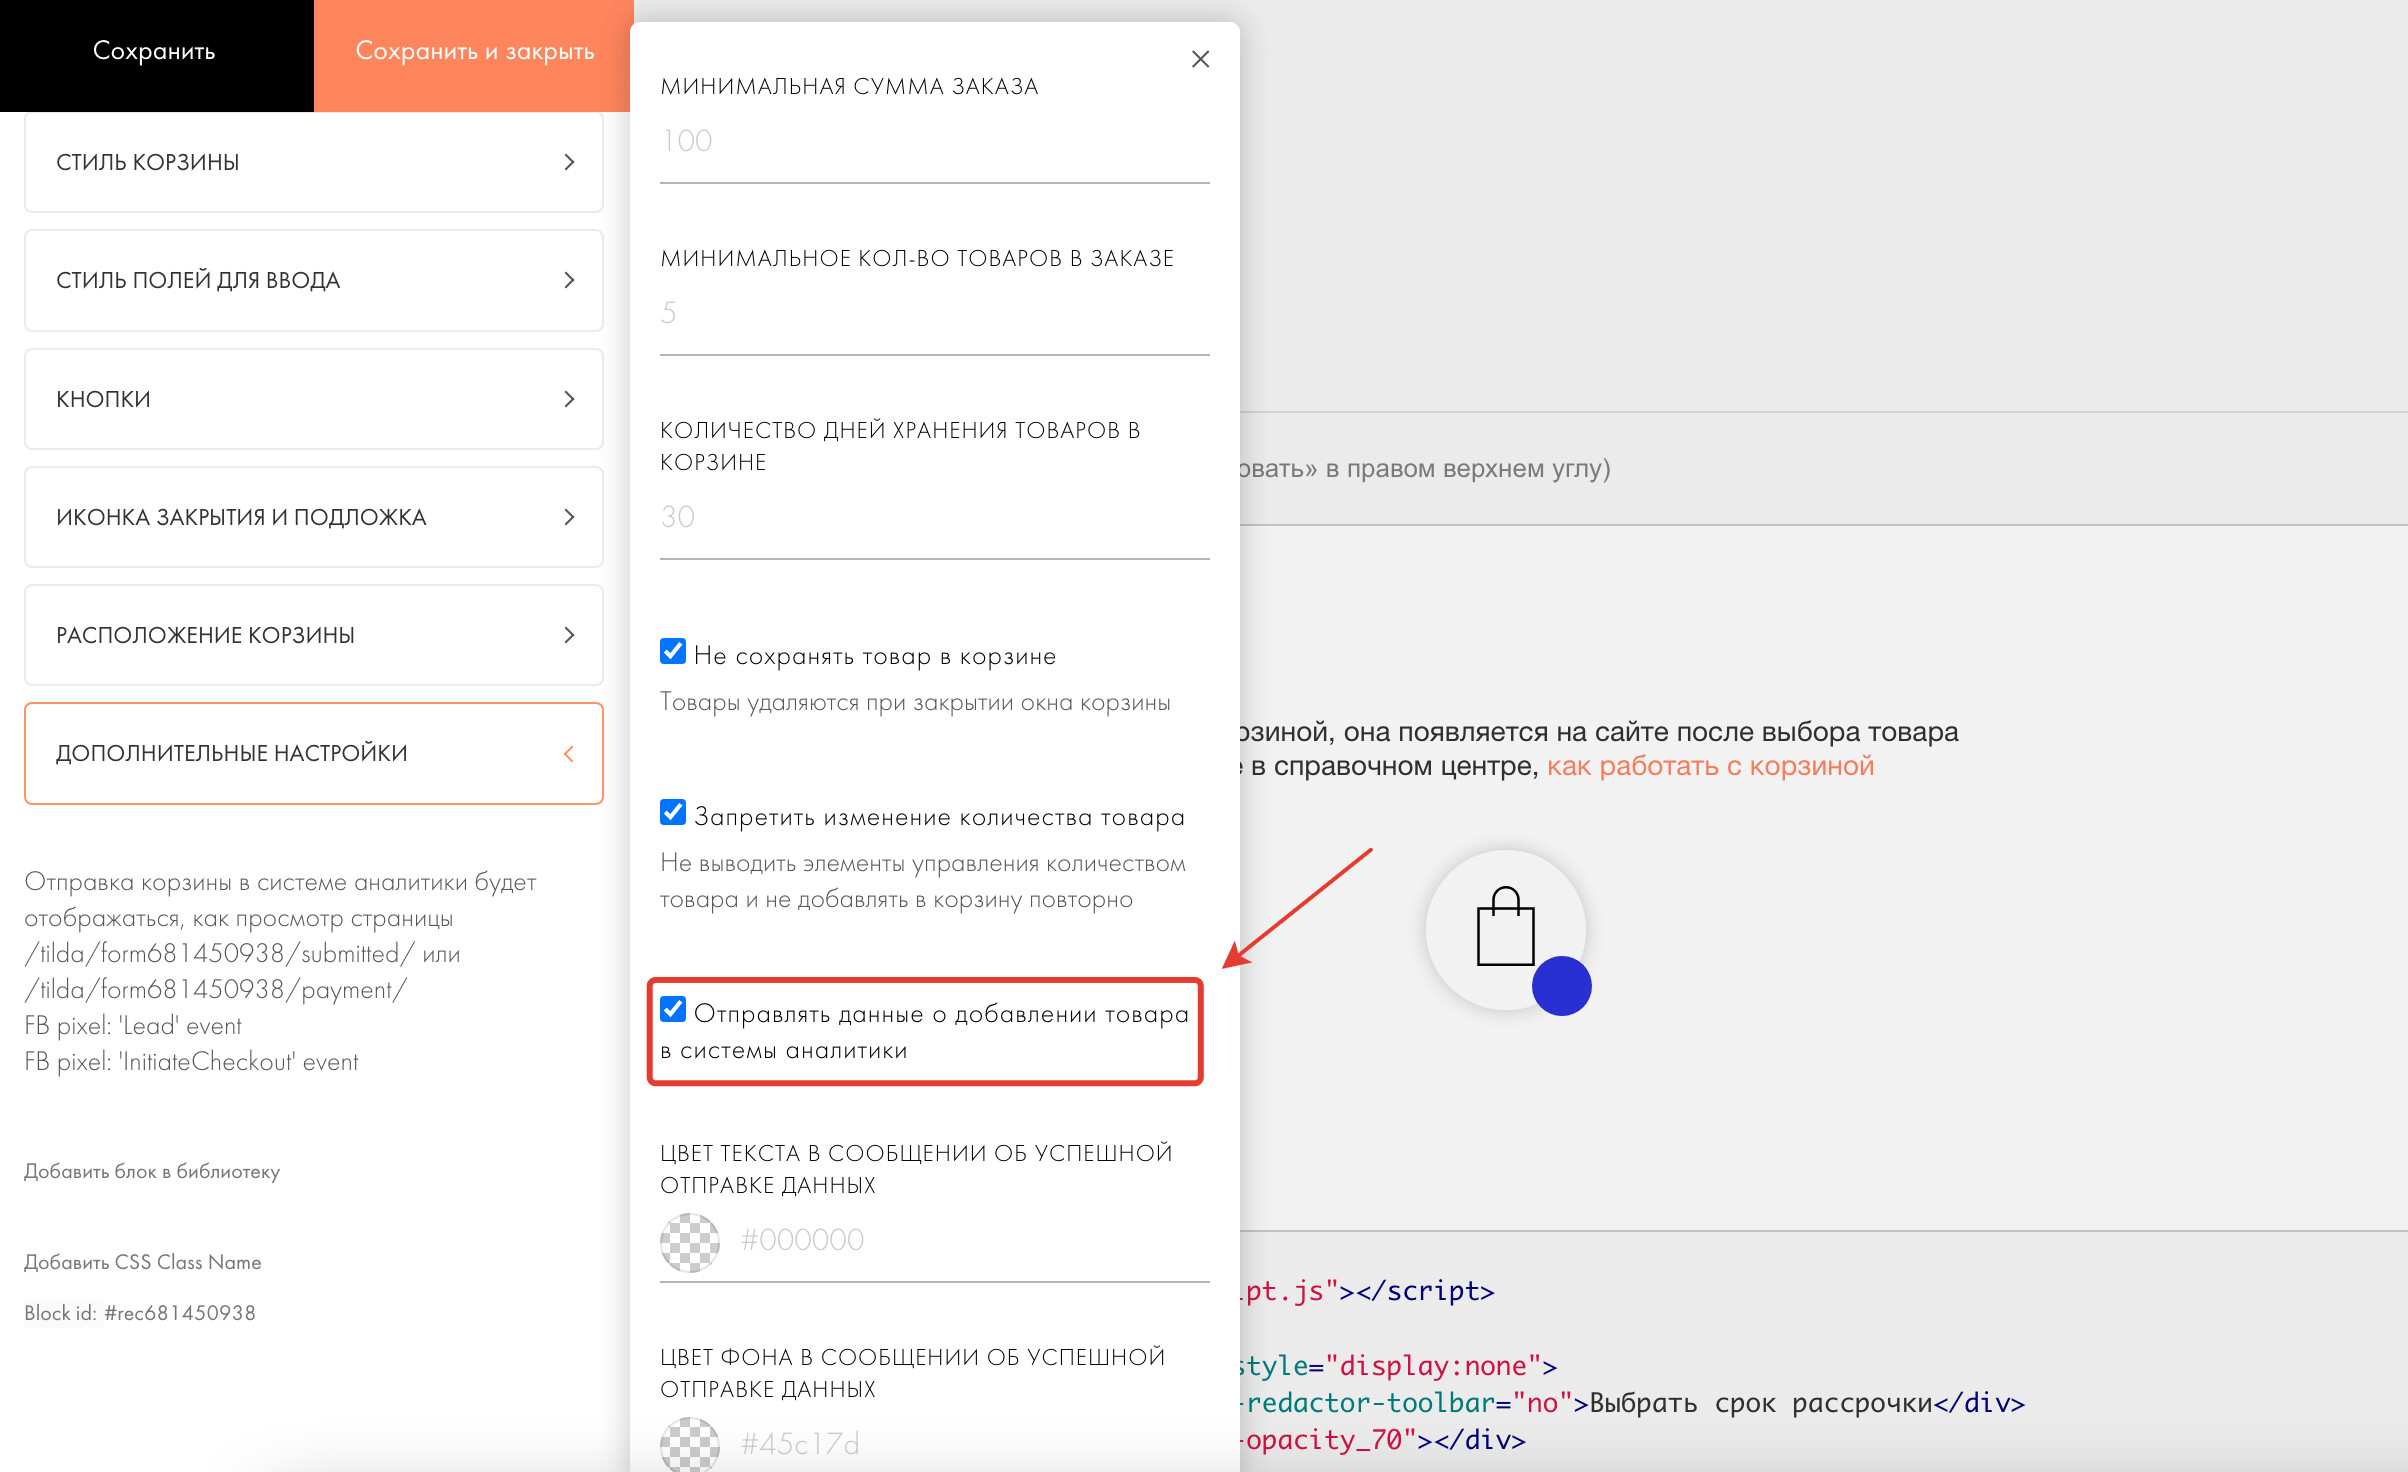
- Go to the page settings, find the “Cart with order form (ST100)” block and open its settings → “Advanced settings” → tick “Send add-to-cart data to analytics systems”:
-
Go to the “Test events” section of your pixel, enter the landing page you plan to send traffic to and submit a test order.
-
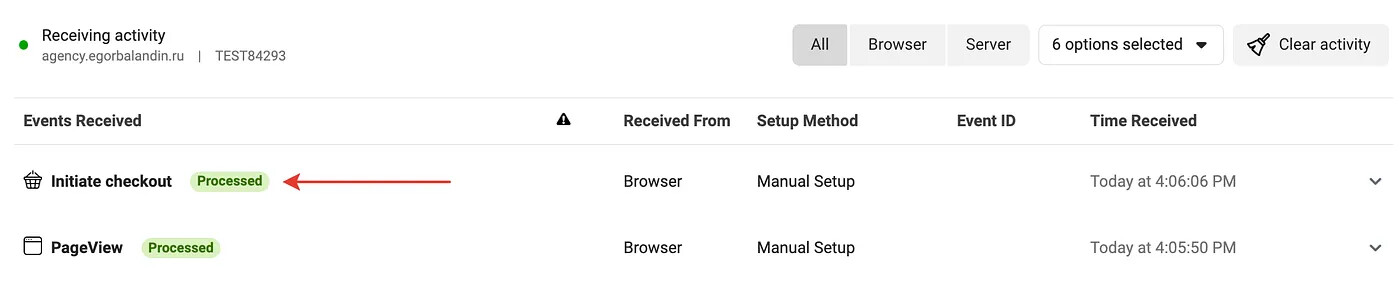
If, after filling in the cart details and proceeding to payment, an Initiate Checkout event appears, it means everything is set up correctly:
- Inside Tilda go to Site settings → Forms → at the very bottom find Facebook Conversion API and add it. In the settings you will need to paste the pixel ID (we know where to find it) and the access token. To find the access token, go to Events Manager → Pixel settings → scroll down and look for “Generate access token”.
A long string of characters will appear — that is the access token; paste it on the page in Tilda.
- After adding it, connect the service to all forms on the site.
Result: after setting up everything available, you will be able to optimize the ads for 3 events:
- Add to cart (AddToCart) — fires on a click on the “Buy” or “Order” button (the first step of the funnel).
- Initiate checkout — fires when all fields are filled in and the user proceeds to payment.
- Purchase — fires only on a successful payment and is sent through the Facebook Conversion API.
Hidden nuances of how the pixel works on Tilda

Tilda sends the same event — Lead — from every form. Sometimes that is fine, but often these events are not equal and we do not need them at all.
Check that the site has no forms intended for different audiences
All forms on the site send data to the pixel, no matter where the form is or what value it has. One site can have many ways to leave contacts:
- A regular form for collecting customer data (what we need)
- A job application form on the “Careers” page (we do not need data from this form at all)
- An email newsletter subscription (far less valuable than a regular form)
- A form for new partners
- A form for corporate clients (needed, but must not be mixed with regular forms)
Using the smenastation.com project as an example, there is a pile of different ways to leave a request:
— Every trip page has a form we want users to fill in
— Almost every page lets you subscribe to the newsletter at the bottom
— There is a corporate trips page, which also has a request form for corporate clients
— There is a “Careers” page
All these 4 different types of submitted requests are sent to Facebook as a Lead event. And that is bad — because different events have different target audiences and different value.
What problems can arise:
- Incorrect statistics — you will see more leads in the Facebook account than actually came in.
- The ads will attract not those who want to buy your services, but those who want to work for you or subscribe to the newsletter.
How to fix it:
-
Let’s start with the careers pages. The easiest way is to remove the standard Tilda forms and use some external way of collecting information (Google Forms, a job board and so on).
-
What can be done to avoid getting extra newsletter data:
— Remove all newsletter subscription blocks from the landing page. Then paid traffic will leave far fewer subscriptions
— Replace the email collection form with a widget from your email service (for example this one)
— Disable all standard events and set up a separate event for each form through Google Tag Manager (very complicated)
- To correctly track those who left a request on a specific page, we create a “Custom Conversion”.
For that, first submit a test request and determine the unique ID of that form:
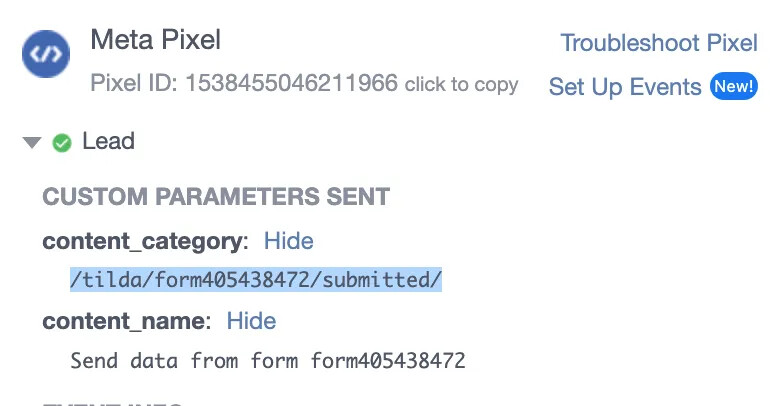
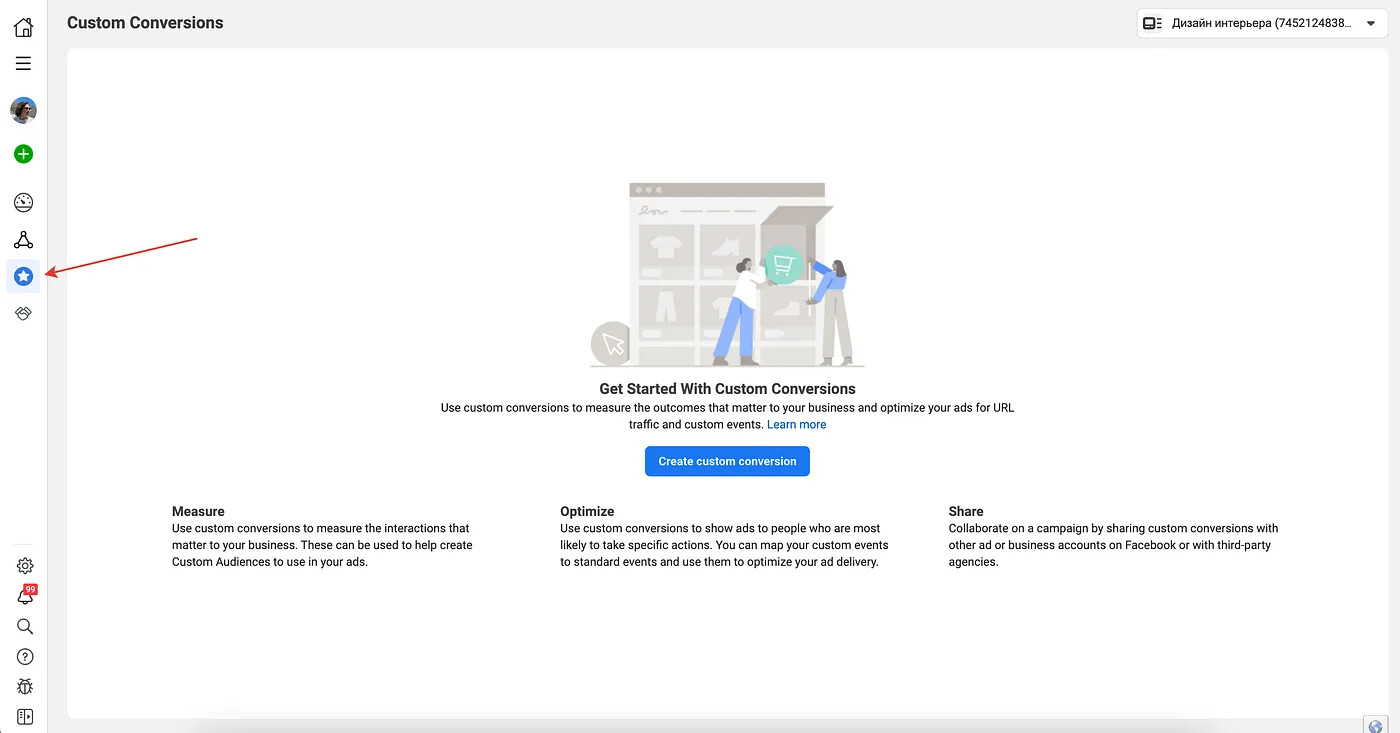
Then inside Facebook, in the Events Manager section, go to Custom Conversions:
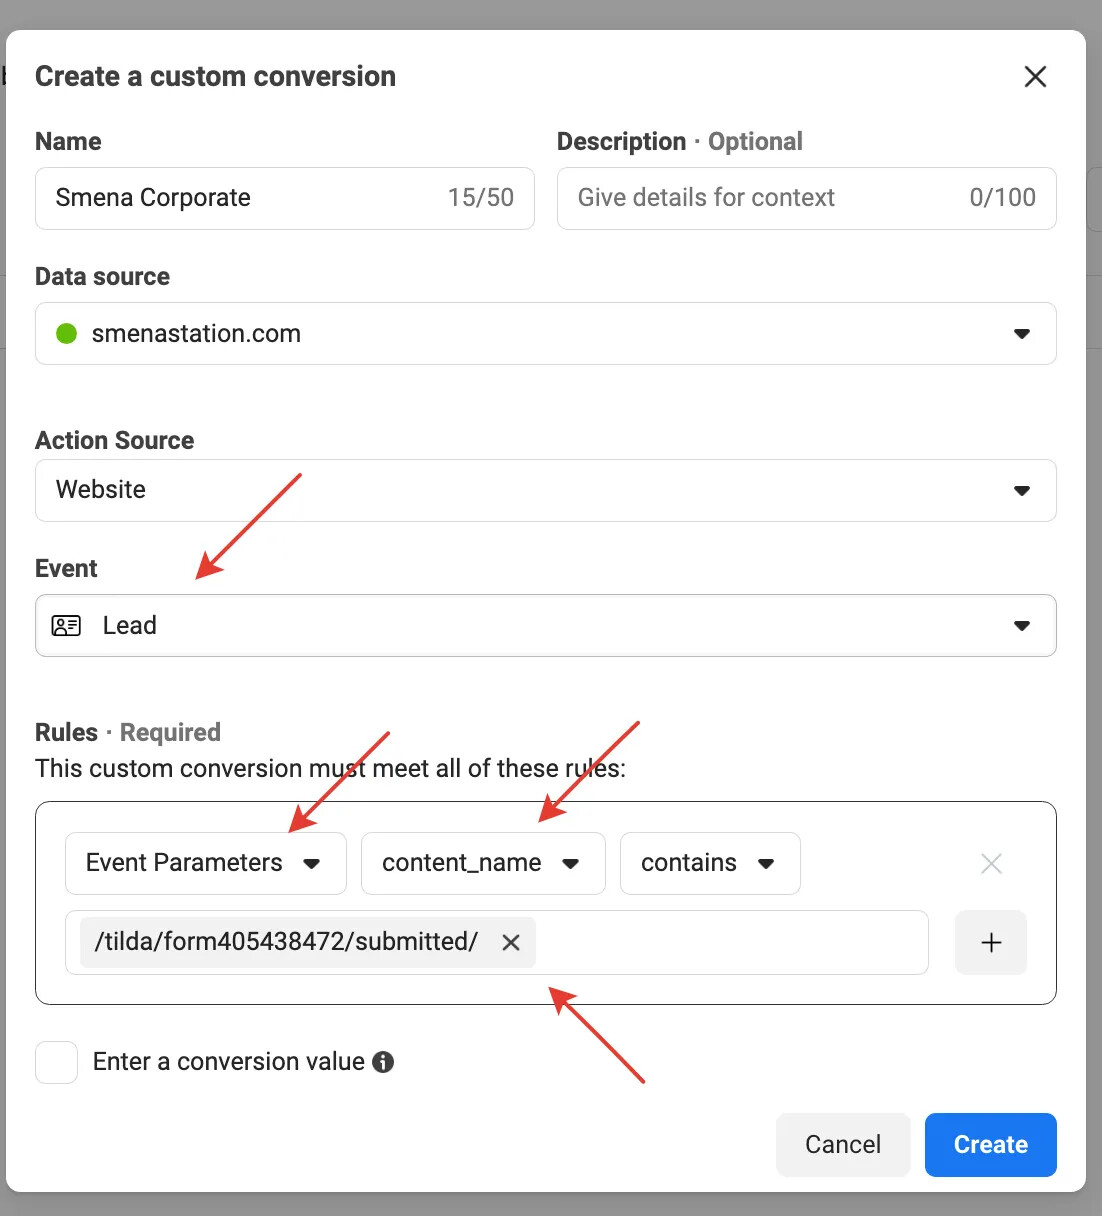
Create a new conversion, choose the Lead event and specify as the parameter the event we got on the test submission:
If your site is on Tilda, do not create custom events based on page visits — they handle the job poorly; set them up through events
That is it for the basic mistakes you can make.
There are a couple more ways to improve event tracking on Tilda, but that is for next time
More interesting things in my Telegram channel: